This recipe for fried okra is easy to prepare but packs a lot of flavor.
From one of the recipes in this blog:
Okra, also known in English speaking countries as Lady’s Finger or Gumbo, is always used in common Filipino vegetable dishes and every vegetable stall in the markets should always have this. The health benefits of okra include:
its ability to lower total cholesterol levels
improve digestive health
improve vision
boost skin health
protect infant health
prevent certain cancers
strengthen bones
improve cardiovascular health
aid the immune system
lower blood pressure
protect heart health
Aside from the fried okra, this recipe also comes with green sambal. Green sambal is a spicy Southeast Asian sauce made with chili peppers. The sambal ingredients used are green chilies (green peppers such as Anaheim (mild) or jalapeno (spicier)), garlic, shallots and olive oil. Since I am from the Philippines, instead of Anaheim Chilies, I used a combination of siling haba and green bell pepper. WARNING: This could get spicy!!!
[adinserter block=”10″]
You could also buy Green Sambal if you wish:

For frying, I like to use cast iron skillets because they offer superior heat retention and even cooking. Cast Iron Skillets look like this:

Ingredients:
- 2 bundles okra
- Olive oil
- 4 siling haba
- 2 small green bell pepper
- 3 green bird’s eye chilies (siling labuyo)
- 1 garlic clove, minced
- 10 shallots
- salt to taste
Instructions:
- Heat olive oil over high heat, and fry the okra (lady fingers) briefly until they are bright green in color, but still crisp. Remove the okra from the pan and set aside.
- Add the peppers, green bird’s eye chilies, garlic, shallots, salt and enough olive oil to a blender. Blend until nearly smooth.
- Reheat the oil in the pan, and sauté the blended paste.
- Serve the green sambal with the fried okra.
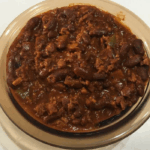
Fried Okra | Fried Okra with Green Sambal

This recipe for fried okra is easy to prepare but packs a lot of flavor. Aside from the fried okra, this recipe also comes with green sambal. Green sambal is a spicy Southeast Asian sauce made with chili peppers.
- 2 bundles okra
- Olive oil (for frying)
- 4 pcs siling haba
- 2 pcs green bell peppers (small)
- 3 pcs green bird’s eye chilies (siling labuyo)
- 1 clove garlic (minced)
- 10 pcs shallots
- salt to taste
-
Heat olive oil over high heat, and fry the okra (lady fingers) briefly until they are bright green in color, but still crisp. Remove the okra from the pan and set aside.
-
Add the peppers, green bird’s eye chilies, garlic, shallots, salt and enough olive oil to a blender. Blend until nearly smooth.
-
Reheat the oil in the pan, and sauté the blended paste.
-
Serve the green sambal with the fried okra.

Other recipes may be found HERE.